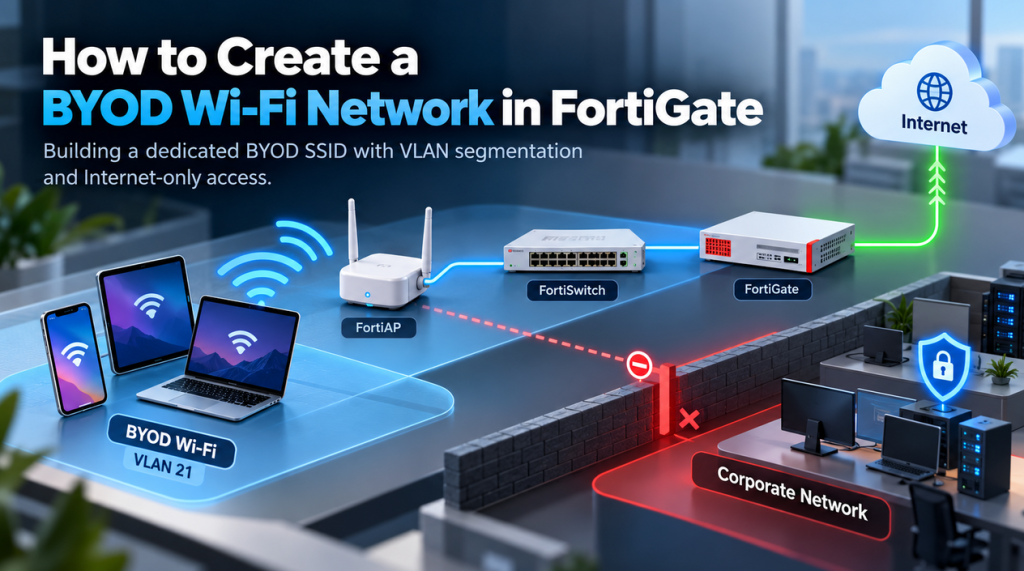
A BYOD wireless network is a good way to give employees Internet access on personal devices without placing those devices directly on the corporate network.
In this walk-through, I’ll go through how I configured a dedicated BYOD SSID using FortiGate, FortiAP, and FortiSwitch. The wireless traffic is placed on its own VLAN and only allowed out to the Internet.
The basic layout looks like this:
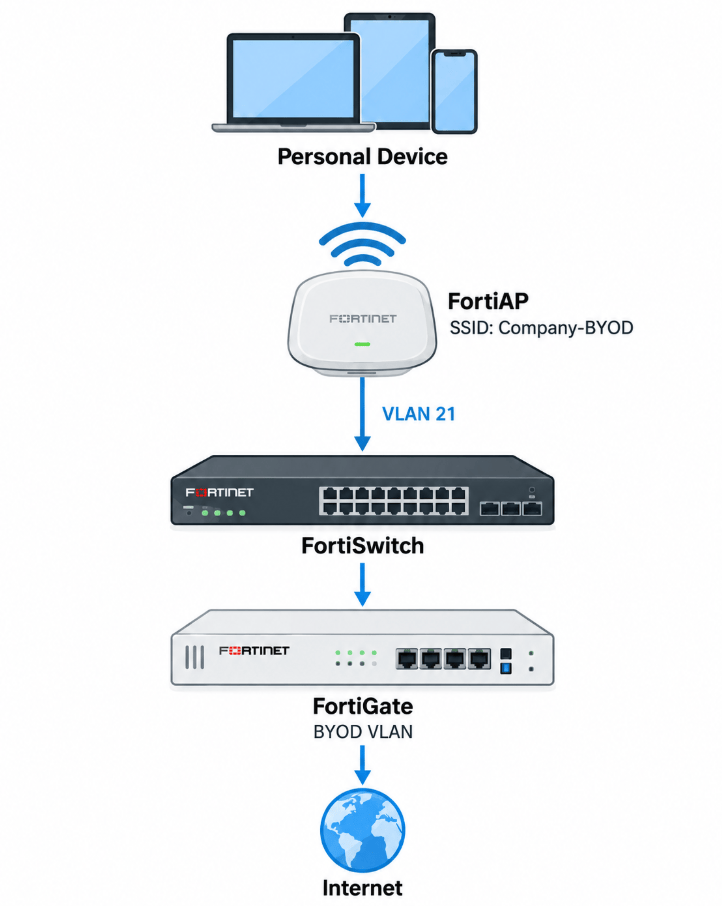
The configuration consists of four main parts:
- Create the BYOD VLAN
- Create the wireless SSID
- Allow the VLAN on the FortiSwitch ports connected to the APs
- Create a firewall policy allowing the BYOD network to reach the Internet
The names and IP addresses used below are examples and should be adjusted to match your environment.
Create the BYOD VLAN
Start by creating the VLAN that will be used by the wireless clients.
Navigate to:
Wifi & Switch Controller > FortiSwitch VLANs
Create a new VLAN interface.
For example:
Name: BYODAlias: BYOD Wi-FiVLAN ID: 21Addressing Mode: ManualIP Address: 192.168.21.1/255.255.255.0
The parent interface will depend on how your environment is configured. In a FortiSwitch environment, this will commonly be associated with the FortiLink interface.
For administrative access, I normally only enable PING if I need it for troubleshooting.
There should be no reason for BYOD users to reach HTTPS, SSH, or other FortiGate management services through this interface.
Configure DHCP
Next, enable DHCP on the new BYOD VLAN.
For example:
DHCP Server: EnabledAddress Range:192.168.21.10 - 192.168.21.254Netmask:255.255.255.0DNS:Same as System DNS
The FortiGate will now act as the DHCP server for devices connected to the BYOD network.
Once configured, the network should look like this:
Network: 192.168.21.0/24Gateway: 192.168.21.1VLAN: 21
Create the BYOD SSID
Navigate to:
WiFi & Switch Controller > SSIDs
Create a new SSID.
Configure the wireless network with settings similar to the following:
Interface Name:BYOD-WIFITraffic Mode:BridgeSSID:Company-BYODBroadcast SSID:Enabled
For this setup, the traffic mode is set to Bridge.
With bridge mode, wireless traffic is placed directly onto the configured VLAN rather than being tunneled through the FortiGate wireless controller.
Configure Wi-Fi Security
For the wireless security settings, configure:
Security Mode:WPA2 PersonalPre-Shared Key Mode:SinglePre-Shared Key:Use a strong unique password
The BYOD password should be different from your internal corporate wireless password.
If supported by your FortiAPs and client devices, WPA3 or WPA2/WPA3 transition mode can also be considered.
Assign the SSID to VLAN 21
Within the SSID configuration, set:
Optional VLAN ID: 21
This causes traffic from devices connected to the BYOD SSID to be tagged with VLAN 21.
Leave the remaining settings at their defaults unless your environment requires something different.
Add the SSID to the FortiAP Profile
Creating the SSID does not automatically mean every FortiAP will begin broadcasting it.
Navigate to:
WiFi & Switch Controller > Managed FortiAPs
Open the FortiAP profile being used by the access points that should broadcast the BYOD network.
Add the new SSID to the appropriate wireless radios.
For example:
2.4 GHz:Company-BYOD5 GHz:Company-BYOD
Apply the configuration and confirm the APs begin broadcasting the SSID.
Allow VLAN 21 on the FortiSwitch Ports
This is one of the more important parts of a bridged SSID configuration.
Because the SSID is using bridge mode, VLAN 21 needs to be allowed on every switch port that carries traffic from the FortiAP back toward the FortiGate.
Start by identifying which FortiSwitch ports the APs are connected to.
For example:
Access Point Switch Port--------------------------------------HQ-AP-01 ACCESS-SW-01 Port 14HQ-AP-02 ACCESS-SW-01 Port 15HQ-AP-03 ACCESS-SW-02 Port 20HQ-AP-04 ACCESS-SW-02 Port 21
Open each switch port connected to an AP and confirm that VLAN 21 is included in the allowed VLAN list.
For example:
Allowed VLANs:BYOD
Some AP ports may already be configured to allow all VLANs. In that case, no additional change may be required.
Also check any switch uplinks between the AP and FortiGate.
If VLAN 21 is missing anywhere along the path, the client may successfully connect to the SSID but fail to receive an IP address.
Create the BYOD Firewall Policy
Once the VLAN and SSID are configured, create a firewall policy allowing the BYOD network to access the Internet.
Navigate to:
Policy & Objects > Firewall Policy
Create a new policy.
For example:
Name:21 - WAN - BYOD Internet AccessIncoming Interface:BYODOutgoing Interface:WANSource:AllDestination:AllSchedule:AlwaysAction:Accept
Enable NAT if required by your Internet configuration.
Configure Allowed Services
In my original configuration, I allowed:
Web Access
This works, but can be fairly restrictive as this service only allows HTTP and HTTPs.
For a more relaxed BYOD policy, you could start with:
TCPUDPHTTPHTTPS
and add additional services as needed.
Whether you restrict outbound ports heavily will depend on how the BYOD network is intended to be used.
For a general employee BYOD network, allowing broader outbound access may be necessary for things such as mobile applications, VPN clients, messaging applications, and software updates.
The main goal is to prevent the BYOD VLAN from reaching internal corporate networks.
Apply Security Profiles
The BYOD firewall policy is also a good place to apply FortiGate security profiles.
Depending on your licensing and requirements, you may want to enable:
- Web Filter
- DNS Filter
- Application Control
- Antivirus
- IPS
Personal devices will normally not have your organization’s internal certificate authority installed, which can make full SSL inspection difficult to implement without generating certificate warnings.
Block BYOD Access to Internal Networks
The BYOD VLAN should not have access to internal systems unless there is a specific business requirement.
This includes things such as:
- Servers
- Domain controllers
- File shares
- Hypervisors
- Management interfaces
- Printers
- Corporate workstations
FortiGate will deny traffic that does not match an existing allow policy, so an explicit deny policy is not always required.
Conclusion
A dedicated BYOD wireless network is a relatively simple way to give employees Internet access on personal devices while keeping those devices separated from the corporate network.
The most important part of the configuration is making sure the traffic remains properly segmented throughout the entire path. The SSID needs to place clients on the correct VLAN, that VLAN needs to be allowed across the FortiSwitch ports and uplinks, and the FortiGate firewall policy should only permit the traffic that BYOD devices actually require.
Once everything is configured, I recommend testing from a personal device to confirm that it:
- Receives an IP address from the BYOD DHCP scope
- Can resolve DNS and access the Internet
- Cannot access internal servers, workstations, printers, or management interfaces
- Is being inspected by any security profiles applied to the firewall policy
If a device can connect to the SSID but does not receive an IP address, checking the VLAN configuration on the AP switch port and any upstream switch links is usually a good place to start.
This setup provides a good foundation for a BYOD network while still leaving plenty of room to expand the configuration with additional controls such as application filtering, DNS filtering, bandwidth limits, device isolation, captive portals, or more advanced authentication.
The goal is ultimately simple: give personal devices the Internet access they need without giving them unnecessary access to the corporate network.


Leave a comment